Flooring Takeoff Software, $39 a Month
Trace room outlines on PDF floor plans and get exact square footage for tile, hardwood, LVP, carpet, and sheet vinyl. Apply built-in material templates for automatic waste and box calculations. Group by material and export per-room quantities for your distributor. Browser-based, $39 a month, 14-day free trial, no credit card.
Flooring Takeoffs, Simplified
A flooring takeoff is square footage by material type, plus linear footage for transitions and wall base. Tile in the bathrooms, LVP in the kitchen, carpet in the bedrooms, with T-moldings, reducers, and quarter round where products meet. Flooring contractors live and die by square footage accuracy. A 342 square foot living room measured at 327 square feet means you are three boxes short of LVP when the crew hits the last hallway. The distributor might have the same dye lot in stock. They might not. Now the job sits half finished while you chase material, and your crew is either idle or pulled to another site. A measurement error of 5 percent on a 2,000 square foot commercial job is 100 square feet of material you either eat or chase. At $6 per square foot for mid-grade LVP, that is $600 you did not plan for. Easy Takeoffs is a browser-based tool for $39 a month that traces room outlines on PDF floor plans and gives exact square footage for tile, hardwood, LVP, laminate, carpet, sheet vinyl, and epoxy. Group measurements by material type so each product gets its own color on the plan and its own line on the export. Measure transition strips and wall base with the linear tool. Export everything to CSV organized by material group. Most takeoff software for flooring companies costs $540 to $1,970 a year. Easy Takeoffs is $468 a year on monthly billing, or $399 on annual, with a 14-day free trial and no credit card. Built-in flooring templates for Tile Flooring, Carpet Flooring, and Hardwood / LVP Flooring let you apply a template to any measurement group and get an automatic material list. The Tile Flooring template calculates tile quantity, thinset, grout, and backer board based on your tile size and layout pattern. The Carpet Flooring template handles broadloom rolls with pattern matching. The Hardwood / LVP template calculates boxes, underlayment, moisture barrier, and quarter round based on your install method.
Area, Linear & Count
Every measurement type your trade needs
Snap to Walls & Corners
Cursor locks to lines, corners, midpoints, and edges
Auto Scale Detection
Reads the scale from your PDF so you can measure instantly
$39 a month
14-day free trial, no credit card, cancel any time
Any Device
Browser-based on Mac, Windows, tablet, or phone
What Is a Flooring Takeoff?
A flooring takeoff is the process of measuring floor areas from construction drawings or PDF plans to calculate exactly how much material you need for a job. You measure the square footage of every room, hallway, closet, and stairwell, then sort measurements by material type. A single floor plan might have ceramic tile in the bathrooms, LVP in the kitchen and living areas, and carpet in the bedrooms. Each material has its own waste factor, box coverage, and ordering unit. A complete takeoff goes beyond square footage. You also need linear measurements for transition strips at doorways, T-moldings, reducers, quarter round along walls, and cove base in commercial spaces. Stairs need separate tread and riser measurements. The finish schedule in the architectural specs tells you which product goes in which room. Residential contractors often field measure with a tape or laser. Commercial contractors work from architectural PDFs because the building may not exist yet. Either way, the goal is accurate quantities so you can order the right material from the same dye lot and avoid mid-project reorders.
How to Do a Flooring Takeoff
Upload your floor plans
Drop your PDF floor plans into Easy Takeoffs. Multi-page support handles every floor of a multi-story building in one project. Commercial plan sets with architectural drawings and finish schedules all live together. Navigate between sheets with the page navigator.
Calibrate the scale
Click two known points on the drawing, like a door opening or a dimensioned wall, and enter the real-world measurement. Auto-detection reads scale notations from the PDF when available. Each page can have its own scale, so enlarged bathroom details at half-inch scale work alongside the main floor plan at quarter-inch scale.
Trace rooms by material type
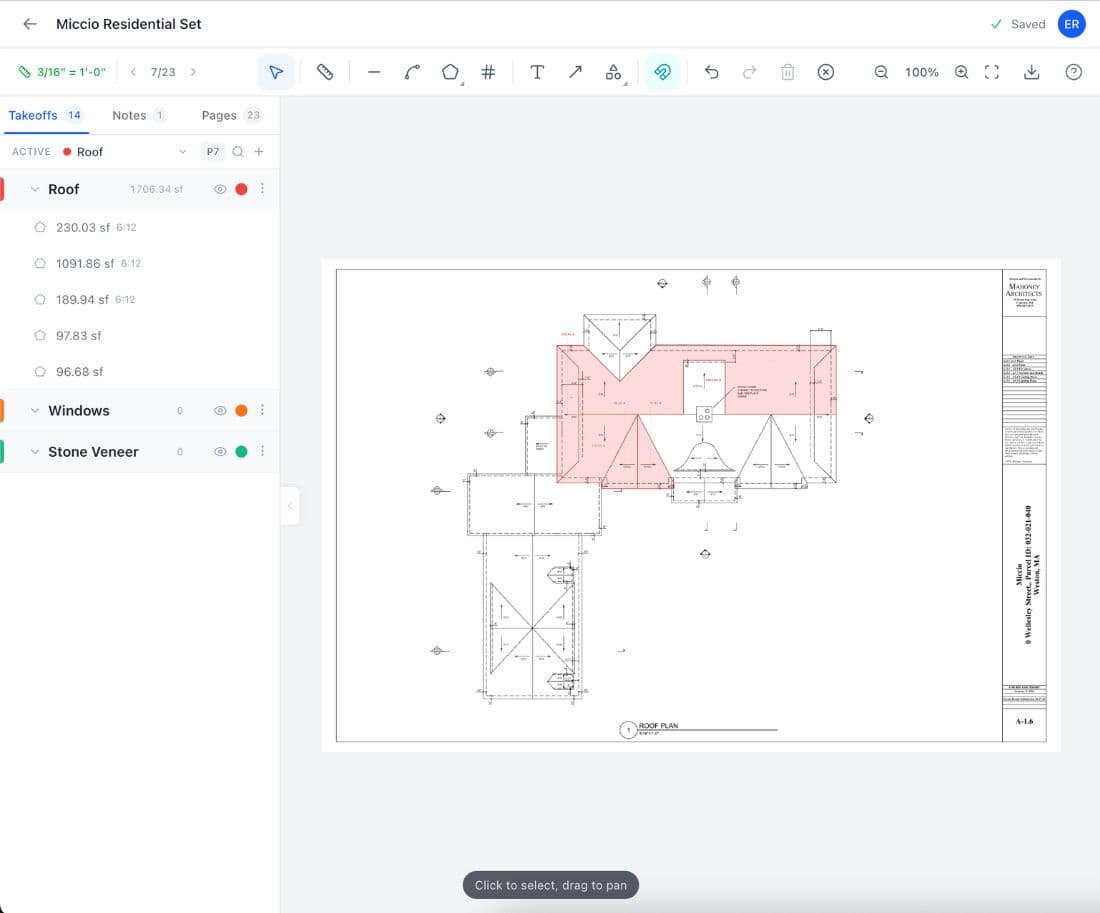
Use the polygon area tool to trace each room. Click the corners and the tool calculates the square footage. Create separate measurement groups for each flooring material: tile, LVP, hardwood, carpet. Each group gets its own color on the plan. Closets, alcoves, and hallways each get their own polygon so nothing is missed.
Export your material list
Export grouped quantities to CSV. Each row shows the room label, material group, and square footage. Linear measurements for transition strips, quarter round, and cove base export in the same file. Apply waste factors per material, convert to boxes or square yards, and send the order list to your distributor.
Built for Flooring
Polygon area tool for irregular rooms
Flooring rarely fits in perfect rectangles. Trace L-shaped kitchens, angled hallways, bay window bump-outs, and curved foyer walls with the polygon tool. Click each corner and the tool calculates the exact area. No breaking rooms into sub-rectangles and adding them up by hand.
Color-coded material groups
Create a group for each material: blue for tile bathrooms, green for LVP living areas, amber for carpet bedrooms. Each group shows its own running square footage total. Visual color overlay on the plan lets you spot missed rooms at a glance and verify material assignments match the finish schedule.
Linear tool for transitions and trim
Measure T-molding at doorways, reducer strips where LVP meets tile, quarter round along walls, and rubber cove base in commercial spaces. Linear measurements export alongside area measurements so your material list covers everything, not just the flooring itself.
CSV export organized by material
Export all measurements to CSV organized by measurement group. Each row includes the room label, material type, and quantity. Import into your estimating spreadsheet or hand directly to your distributor. One export covers square footage, linear measurements, and count items.
Automatic scale detection
Most architectural PDFs have the scale printed on the sheet. Easy Takeoffs reads it automatically. For plans without a printed scale, click two points on any dimensioned line and enter the known distance. Each page can have its own scale, so enlarged details work alongside full floor plans.
$39 a month, flat
Most flooring takeoff software charges $540 to $1,970 a year. MeasureSquare, PlanSwift, and STACK all require paid subscriptions for full functionality. Easy Takeoffs is $39 a month or $399 a year, with a 14-day free trial and no credit card. Switching from MeasureSquare saves $1,502 a year per estimator on monthly billing.
Built-in Flooring Templates
Apply Tile Flooring, Carpet Flooring, or Hardwood / LVP Flooring templates to your measurement groups for automatic material lists with waste factors and rounding. Adjust properties like tile size, layout pattern, install method, and whether to include underlayment or quarter round to match your job.
Check your quantities before you bid
Each one shows the formula and a worked example so you can check the number, not just trust it. Free, no signup. For exact quantities, measure from your plans.
Flooring Waste Factors
Industry-standard waste percentages for common flooring materials. Apply these to your measured quantities for accurate ordering.
Typical Waste Factors
Straight lay generates waste from cuts at walls and thresholds. Larger format tiles (12x24, 24x24) waste less per cut than smaller formats. Small bathrooms waste proportionally more because the perimeter-to-area ratio is higher.
Rotating the grid 45 degrees means every wall intersection is an angled cut, creating triangular offcuts that rarely fit elsewhere. A 10x12 bathroom in diagonal layout can waste 15 to 18 percent.
Herringbone and chevron patterns create angled cuts at every perimeter edge and generate small, unusable offcuts. Experienced installers confirm anything less than 20 percent risks running short. Budget 20 to 25 percent for rooms under 200 square feet.
Random-length bundles mean end cuts, defective boards, and grain direction matching at doorways all consume material. Wider planks (5 inch plus) waste slightly more because each bad board costs more square footage.
Click-lock vinyl plank generates waste from end cuts and staggered starter rows. Simple rectangular rooms run 7 percent. Add 3 to 5 percent for rooms with multiple doorways, closets, or angled walls.
Laminate behaves similarly to LVP but is less forgiving of mistakes. A cracked tongue during installation means a scrapped plank. Budget 8 percent for standard rooms and 12 percent for diagonal installation.
Broadloom comes in 12-foot or 15-foot rolls. Rooms wider than the roll require seams, and seam placement determines waste. A 16-foot wide room using 12-foot carpet needs two strips, wasting up to 8 feet of width. Add 10 percent for patterned carpet where the repeat must align across seams.
Why Flooring Contractors Need Better Takeoffs
Short orders that stall the crew
You measured the living room at 342 square feet, added 10 percent waste, and ordered 38 boxes of LVP. The crew opens box 36 and finds a dye lot variation. Now you need 4 more boxes from the same lot, and the distributor shipped their last pallet to another contractor. The job sits half finished for three days while you track down matching material. Three days of crew downtime at $1,200 per day is $3,600 in lost labor. An accurate digital takeoff with the right waste factor prevents this before it starts.
Irregular rooms measured as rectangles
Scaling an L-shaped kitchen with a paper ruler means breaking it into rectangles, measuring each one separately, and adding them up by hand. Miss the alcove behind the refrigerator or the bump-out by the bay window and you are short material on install day. Digital polygon tools trace the actual room shape in seconds and calculate the area automatically. No geometry, no rounding errors, no forgotten corners.
Multiple materials on one plan with no way to separate them
A single floor plan has tile in the bathrooms, LVP in the kitchen and hallways, hardwood in the dining room, and carpet in the bedrooms. Without grouped takeoffs, you measure everything, then sort quantities by hand into separate material orders. One missed room in the wrong group means ordering 200 square feet of LVP when you needed carpet. Measurement groups keep each material visually separated on the plan and in the export.
Paying for software you use a few times a week
Most flooring contractors bid two or three jobs a week. But PlanSwift costs $1,749 per year and MeasureSquare Commercial runs $1,970 per year. That is $145 to $164 per month for a tool you might open fifteen times. Easy Takeoffs handles the same core measurement workflow for $39 a month: upload PDFs, set scale, trace rooms, export quantities. Switching from PlanSwift saves $1,281 a year per estimator on monthly billing, or $1,350 on annual.
Common Flooring Takeoff Mistakes
Forgetting closets and alcoves
A standard closet is 10 to 15 square feet. A master walk-in is 40 to 80. Miss four closets and you are 60 to 100 square feet short, which is $360 to $600 in LVP at $6 per square foot plus the reorder delay. Measure every enclosed space: coat closets, pantries, laundry alcoves, and the nook behind the refrigerator.
Using one waste factor for everything
Straight-lay LVP wastes 7 percent. Herringbone tile wastes 20 percent. A flat 10 percent across the board means over-ordering simple rooms and running short on complex ones. Match the waste factor to the specific material and installation pattern for each room.
Skipping scale verification
A plan labeled quarter-inch scale that was printed at 90 percent is off by 10 percent on every measurement. On a 2,000 square foot job, that is 200 square feet of error. Always calibrate against a known dimension, like a door width, before starting your takeoff.
Ordering from different dye lots
LVP from one production run may not match the next, even in the same product line. The difference is subtle in the warehouse and obvious on the floor. Order all material from one dye lot in a single purchase. Check the lot number before accepting any mid-project deliveries.
Missing transition strips and wall base
A typical three-bedroom house has 15 to 20 doorway transitions and 400 to 600 linear feet of base molding. These accessories are commonly missed because they are linear measurements, not area. Measure transitions and trim during the takeoff, not after. Missing them means a second order and a second trip.
Flooring Takeoff Pro Tips
Group by material and by room
Create top-level groups for each material type: tile, LVP, hardwood, carpet. Inside each, add sub-groups for individual rooms. Your tile group might have sub-groups for the master bath, guest bath, and laundry. Your LVP group covers the kitchen, living room, and hallways. This structure serves two audiences with one export. Your installer gets the per-room breakdown showing exactly how much material goes where. Your distributor gets the material-level totals for the purchase order. Without sub-groups, you end up re-sorting quantities by hand after every takeoff. Color-code each top-level group so material assignments are visible on the plan at a glance. A quick scan confirms every room is measured and assigned to the right product before you export.
Mark transitions during the area takeoff
When you reach a doorway while tracing a room perimeter, switch to the linear tool and mark the transition strip right then. Measure the door opening width and assign it to the same material group as the room you are working on. This catches every transition naturally as part of the room-by-room workflow. Going back after the area takeoff to hunt for transitions means scrolling through the plan again, trying to remember which doorways connect different materials. It is easy to miss one or two. A typical three-bedroom house has 15 to 20 transitions. At $12 to $25 per strip, that is $180 to $500 in accessories. Missing a handful means a second order and a second trip to the supplier.
Cross-reference the finish schedule
On commercial projects, the finish schedule in Division 9 of the specs assigns specific products to specific rooms by room number. Open the finish schedule alongside the floor plans and check each room number as you trace it. Catching a material assignment error during the takeoff costs nothing. Catching it on install day, when the crew opens boxes of LVP in a room that should have carpet tile, costs a reorder plus idle labor time. Label each measurement with the room number from the finish schedule. When you export to CSV, each row ties back to the spec. This makes it simple to compare your quantities against the architect's intent and catch discrepancies before they become change orders.
Start tile where cuts will be largest
Before the installer begins, plan the tile layout on the floor plan by checking where the first full tile lands. Shift the starting point until the smallest perimeter cut is at least half a tile wide. Moving the layout four inches can turn a two-inch sliver into a six-inch piece. Small slivers along walls are hard to cut cleanly, crack easily during installation, and look unprofessional. They also generate more waste because each failed cut scraps a full tile. Use the linear tool to check the distance from the starting wall to the opposite wall. Divide by the tile dimension to see how the layout lands. If the last tile at the far wall is less than half width, offset the start by half a tile.
Order one dye lot, keep extras
Order all flooring material from the same production lot in a single purchase. Verify the lot number on every carton before accepting the delivery. Even the same product from the same manufacturer can show visible color variation between lots. If you run short mid-project and the distributor has sold through your lot, you face a choice between installing mismatched material that the homeowner will notice or waiting days to weeks for a matching lot. Either option costs you money and credibility. After the job is done, keep at least one unopened box from the same lot. Six months later, when the homeowner drags a refrigerator across three planks, you can replace them with a perfect match. Sourcing a specific dye lot months after the fact is nearly impossible.
Flooring Takeoff Questions
A flooring takeoff is the process of measuring floor areas from construction drawings or PDF plans to calculate material quantities for a job. You measure each room's square footage, sort measurements by material type, apply waste factors, and convert the totals into an order for your supplier. The term "takeoff" comes from the estimating practice of taking off quantities from blueprints. For flooring contractors, this means measuring every floor area on the architectural plans: living rooms, kitchens, bathrooms, hallways, closets, stairs, and any other space receiving flooring. A complete flooring takeoff is more than the floor area. You also need linear footage for transition strips at doorways where materials change, T-moldings and reducers at height transitions, quarter round or shoe molding along walls, and cove base in commercial spaces. Stairs require separate tread and riser measurements plus stair nosing quantities. Residential flooring contractors often do takeoffs by field measuring at the home with a tape measure or laser. Commercial contractors almost always work from architectural PDF plans because the building may not be built yet or access is limited during construction. Digital takeoff software lets you trace room outlines on the PDF and calculates the area automatically, which is faster and more repeatable than scaling with a ruler.
Upload the PDF floor plans into takeoff software, calibrate the drawing scale, then trace each room outline with a polygon tool to calculate square footage. Group rooms by material type and export quantities for ordering. The full process has four steps. First, load the architectural floor plans into Easy Takeoffs. If you have a multi-story building, all pages go into one project. Second, calibrate the scale by clicking two points on a known dimension, such as a door width marked at 3 feet on the plan. This tells the software how to convert screen pixels to real-world measurements. Third, trace each room using the polygon area tool. Click the corners of the room and the tool calculates the square footage. Create separate measurement groups for each flooring material: one for tile, one for LVP, one for carpet, one for hardwood. Each group shows its own running total. As you trace rooms, check the finish schedule to confirm which material goes where. Fourth, export the grouped measurements to a CSV file. Each row shows the room label, material group, and square footage. Add the appropriate waste factor per material, round up to whole boxes or rolls, and send the order to your distributor. Include linear measurements for transitions, base molding, and stair nosing in the same export.
Multiply the room's length by its width to get the square footage, add your waste factor percentage, then divide by the box coverage to get the number of boxes. For a rectangular room, the formula is straightforward: length times width equals square footage. A 15-foot by 20-foot room is 300 square feet. Apply your waste factor, say 10 percent for standard LVP, and the adjusted total is 330 square feet. If each box covers 23.6 square feet, divide 330 by 23.6 and round up to 14 boxes. Irregular rooms require a different approach. Break L-shaped rooms, hallways with jogs, and rooms with bay windows into simpler rectangles, calculate each one, and add them together. Or use a digital polygon tool that traces the actual room outline and calculates the area automatically. Do not forget to measure every space that receives flooring. Standard closets add 10 to 15 square feet each. Walk-in closets add 40 to 80 square feet. A three-bedroom house with a master walk-in, three standard closets, a pantry, and a laundry alcove can have 150 to 200 square feet hiding in small spaces. For carpet, convert square feet to square yards by dividing by 9. Carpet is still commonly sold in square yards, so a 300 square foot room is 33.3 square yards.
The standard waste factor for most flooring materials in straight lay is 10 percent, accounting for cuts at walls, starter row offcuts, transitions at doorways, and defective pieces. However, 10 percent is only a starting point. The right waste factor depends on the material, installation pattern, room shape, and room size. Ceramic or porcelain tile in straight lay: 10 percent. Large format tiles waste less per cut than small format. Diagonal tile layout: 15 percent, because every wall intersection becomes an angled cut. Herringbone or chevron tile: 20 percent minimum, with experienced installers budgeting 20 to 25 percent for rooms under 200 square feet. Hardwood planks: 10 percent for random-length bundles with end cuts and grain matching. LVP and laminate: 7 to 10 percent for rectangular rooms, 10 to 12 percent for rooms with multiple doorways and angles. Carpet broadloom: 10 to 15 percent, driven primarily by roll width constraints (12-foot or 15-foot rolls) and seam placement. Patterned carpet adds another 10 percent for repeat matching at seams. Smaller rooms waste proportionally more than large open areas because the ratio of perimeter cuts to total area is higher.
Order 10 percent extra for standard installations. Adjust upward to 15 to 20 percent for diagonal layouts, herringbone patterns, or rooms with complex shapes. The waste factor covers material lost to cuts, but there are other reasons to order extra. Defective pieces happen: a cracked tile, a warped plank, or a laminate piece with a damaged click-lock joint all go to scrap. On a typical job, 1 to 3 percent of material from each box is defective or damaged. Pattern matching consumes extra material when applicable. Carpet with a pattern repeat must align at seams, which means cutting off material at the start of each strip to match the previous strip. This can add 10 percent or more beyond the area calculation. The most important reason to order extra is dye lot consistency. Flooring manufactured in different production runs can vary in shade, texture, and finish. If you run short mid-project and the distributor has sold through your lot, you face a choice: install mismatched material or wait days or weeks for a matching lot. Order all material from one dye lot in a single purchase. After the project, keep at least one full box for future repairs. Matching a specific dye lot months later ranges from difficult to impossible.
Break the irregular room into simpler geometric shapes, calculate the area of each shape separately, then add them together. Or use a digital polygon tool that traces the actual outline and calculates the area in one step. Most rooms are not perfect rectangles. L-shaped kitchens, hallways with jogs, bay window bump-outs, angled walls, and open floor plans that flow between rooms all create irregular shapes. The manual method divides the room into rectangles: an L-shaped room becomes two rectangles. Measure each separately and add them. This works but gets tedious for rooms with three or four jogs, and it is easy to double-count or miss an area. Digital takeoff software eliminates this step. Upload the floor plan, set the scale, and click the corners. The polygon tool handles any shape, any number of sides, even curves if you click enough points along the arc. The calculated area is exact to the drawing. For field measurements of irregular rooms without plans, measure the longest and widest dimensions, then subtract the areas that fall outside the room. Adding 2 to 3 percent extra on top of the standard waste factor accounts for the imprecision of irregular room estimation.
A flooring estimate includes material quantities by type, waste allowance, material costs, accessory quantities (transitions, base molding, underlayment, adhesive), labor costs, subfloor preparation, and project overhead. The takeoff provides the raw quantities: square feet of tile, square feet of LVP, linear feet of transition strips, number of stair nosings. From those quantities, you build the full estimate. Material costs come from your distributor. Mid-grade LVP runs $3 to $7 per square foot. Porcelain tile runs $2 to $10. Hardwood runs $5 to $15. Carpet broadloom runs $1 to $5. Accessories add up fast. Transition strips run $8 to $25 each. Quarter round costs $0.50 to $2 per linear foot. Stair nosing is $15 to $50 per piece. Underlayment for floating floors runs $0.25 to $0.75 per square foot. Adhesive for glue-down installations costs $40 to $80 per gallon at 50 to 60 square feet per gallon. Labor depends on material and complexity. Click-lock LVP installation runs $1.50 to $3.50 per square foot. Tile with setting and grouting runs $4 to $8. Hardwood nail-down runs $3 to $6. Add $1 to $3 per square foot for demolition and $1 to $4 per square foot for subfloor preparation if needed.
A takeoff measures quantities from the plans. An estimate prices those quantities into a bid. The takeoff answers "how much material?" and the estimate answers "how much will it cost?" The takeoff is the first step: open the floor plans and measure square footage for each room, linear footage for transitions and base molding, and counts for items like floor drains or stair nosings. The result is a quantity list organized by material type. The estimate takes those quantities and applies pricing. Material costs come from your supplier. Labor rates come from your crew's productivity and pay. Overhead includes insurance, vehicles, office expenses, and your margin. For residential work, many contractors combine both into a single process: measure the rooms, multiply by material price, add labor and markup, present a total. For commercial work, the two steps are usually separate because the takeoff feeds into a formal bid package with detailed line items and a schedule of values. Getting the takeoff wrong cascades through the entire estimate. If you measured 1,800 square feet but the actual area is 2,000 square feet, every dependent cost is understated. You win the bid because you are the lowest price, then lose money because the real cost is 11 percent higher than what you quoted.
Easy Takeoffs is $39 a month or $399 a year, with a 14-day free trial and no credit card required. It is the cheapest dedicated flooring takeoff tool on the market. MeasureSquare's commercial edition costs $1,970 a year, PlanSwift is $1,749 a year, STACK starts at $2,599 a year, and Bluebeam Revu Complete is $440. Switching from MeasureSquare saves $1,502 a year on monthly billing, from PlanSwift $1,281, from STACK $2,131. Every measurement tool is available from signup: upload PDF floor plans, calibrate scale, trace rooms with the polygon area tool, measure transitions with the linear tool, organize measurements in color-coded groups by material type, add labels, and export to CSV. The tool runs in your browser on any device. There is nothing to download or install. Projects save to the cloud automatically, so you can start a takeoff on your office desktop and finish it on your tablet at the jobsite. You can cancel any time from the customer portal.
Divide the total square footage (including waste) by the box coverage, then round up to the nearest whole box. You cannot buy partial boxes. Here is the calculation: measure the total floor area (300 square feet for a 15-by-20 room), apply the waste factor (300 times 1.10 equals 330 square feet at 10 percent waste), check the box coverage printed on the product (a typical LVP box covers 18 to 24 square feet), and divide (330 divided by 23.6 equals 13.98, round up to 14 boxes). For multi-room projects, add the total area of all rooms receiving the same product before calculating boxes. Do not calculate per room and add the boxes, because rounding up per room over-orders slightly. Exception: if different rooms need different products, calculate them separately. Box coverage varies by product and manufacturer. Shaw Floorte LVP covers about 23.6 square feet per box. COREtec Plus Premium covers 16.5 square feet. Standard 12x12 ceramic tile boxes contain 11 to 15 square feet. Check the coverage before ordering, not after. If you assumed 20 square feet per box but the product actually covers 15.5, you will be short by 5 boxes on a 30-box order.
Use 15 percent for diagonal (45-degree) tile and 20 percent minimum for herringbone or chevron patterns. These account for the angled cuts that generate unusable offcuts at room perimeters. Diagonal tile installation rotates the grid 45 degrees so tiles sit diamond-shaped. Every wall intersection becomes an angled cut instead of a straight one. The triangular offcuts from one wall rarely fit at the opposite wall because room dimensions do not align to the rotated grid. This pushes waste to 13 to 18 percent, with 15 percent being the safe standard. Herringbone is worse because the zigzag pattern creates small triangular waste along every straight edge. The angle between the herringbone pattern and the wall is roughly 45 degrees on two sides and parallel on the other two, but the stagger means even the parallel edges generate odd-shaped cuts. Experienced tile installers consistently recommend 20 percent minimum. In rooms under 200 square feet, budget 22 to 25 percent because the high perimeter-to-area ratio amplifies the waste. Chevron patterns are similar but each plank has two angled ends, creating waste on both sides. Running bond (brick pattern) with rectangular tiles is only slightly more wasteful than straight lay, roughly 10 to 12 percent, because the offset rows create staggered cuts at one pair of walls but straight cuts at the other.
Measure the linear footage of each doorway opening for transition strips and the room perimeter minus door openings for base molding. Use a linear or polyline tool in takeoff software to trace these runs on the floor plan. Transition strips go where two different flooring materials meet, typically at doorways. T-moldings connect floors at the same height. Reducers connect floors at different heights, like LVP meeting tile. Each doorway gets one piece, usually 36 inches for a standard interior door. Count the doorways where materials change and multiply by the opening width. Base molding (quarter round, shoe molding, or rubber cove base) runs along the bottom of every wall. Measure the full perimeter of each room and subtract door openings. A 15-by-20-foot room has a 70-foot perimeter. Subtract two 3-foot openings and you need 64 linear feet. For a full house, total base molding easily reaches 400 to 600 linear feet. Stair nosing is measured per tread. Count the stairs receiving flooring and each one needs one nosing piece. Standard pieces are about 47 inches long. In takeoff software, use the linear tool to trace along doorways for transitions and along walls for base molding. Create a separate measurement group for accessories so they export cleanly alongside your area measurements.
Yes. Easy Takeoffs handles commercial flooring projects with multi-page PDF plan sets, per-page scale calibration, and measurement groups that map to spec divisions and finish schedules. Commercial takeoffs differ from residential in several ways. The plan sets are larger, often 50 to 200 pages covering multiple floors. The finish schedule, typically in Division 9 of the specifications, tells you which flooring product goes in which room by room number. Easy Takeoffs supports multi-page PDF uploads so the entire set lives in one project. Each page can have its own scale calibration, which matters because enlarged details may be at half-inch scale while the main floor plan is at quarter-inch scale. For commercial projects, create measurement groups that match your bid structure: one group per spec section, per floor, or per product type. Label each measurement with the room number so your quantities map directly to the finish schedule. Commercial projects often involve VCT, carpet tile, sheet vinyl, broadloom carpet, rubber flooring, and epoxy in addition to LVP and ceramic tile. The polygon area tool handles all of these because the measurement process is the same: trace the room outline to get square footage. The difference is in waste factors, ordering units (square yards for carpet, cartons for VCT), and accessories (commercial cove base instead of residential quarter round).
Digital takeoff from properly scaled architectural PDFs matches the designed dimensions to within 1 percent. Field conditions like out-of-square walls and floor level variations may differ slightly from the drawing, but the takeoff reflects the architect's design, which is the standard basis for bidding and ordering. The accuracy depends entirely on scale calibration. If the scale is set correctly, every measurement matches the dimensions the architect drew. Architectural floor plans are created in CAD software at real-world scale, so a wall drawn at 15 feet is exactly 15 feet in the design. When you calibrate against a known dimension, the software maps pixels to feet accurately. Where digital takeoff can differ from reality is in the building itself. Walls are not perfectly straight. Rooms are rarely perfectly square. A room that measures 15 by 20 feet on the plans might measure 15 feet 1 inch by 19 feet 11 inches in the field. For flooring purposes, this difference is negligible because it falls within the waste factor. Commercial contractors rely on digital takeoff because they bid before the building is complete. Residential contractors sometimes prefer field measurement because the home exists and they can catch conditions that differ from original plans. Both methods are valid. Digital takeoff is faster for large projects and produces documented quantities. Field measurement catches as-built conditions.
Create a separate measurement group for each material type. This keeps tile, LVP, hardwood, and carpet quantities visually separated on the plan and organized in the export for individual material orders. In Easy Takeoffs, create groups before you start measuring. Name them by material: "Tile - Bathrooms," "LVP - Kitchen/Living," "Carpet - Bedrooms." Assign each group a different color so you can see at a glance which rooms have been measured and which material each room receives. As you trace rooms, select the appropriate group first, then trace. The room outline appears in that group's color. When you are done, each group shows its own running total. You can see immediately that your tile group has 180 square feet across three bathrooms, while your LVP group has 850 square feet covering the kitchen, living room, and hallways. When you export to CSV, each row includes the group name, room label, and square footage. You can send one report to your tile supplier and a different report to your LVP distributor, each showing only the rooms and quantities they need. For commercial projects, the finish schedule tells you which product goes in which room. Create your groups to match the spec sections and cross-reference room numbers as you trace. Catching a material assignment error during takeoff is free. Catching it during installation costs a reorder and idle crew time.
Yes. Easy Takeoffs includes three flooring templates: Tile Flooring, Carpet Flooring, and Hardwood / LVP Flooring. Apply any of these to a measurement group and it generates a full material list from your square footage. The Tile Flooring template calculates tile quantity, thinset, grout, backer board, and spacers based on your tile size and layout pattern, with waste factors adjusted for straight lay, diagonal, or herringbone. The Carpet Flooring template calculates broadloom yardage with seam waste and optional pad and transitions. The Hardwood / LVP Flooring template calculates boxes based on your product coverage, plus underlayment, moisture barrier, and quarter round if needed. You can adjust every property to match the specific product and installation method for your job.
Start Your Construction Takeoff Today
Upload your first PDF plan set, set the scale, and pull accurate quantities before lunch. $39 a month after the trial, less than every dedicated competitor.